MCP Servers
Expose FileMaker scripts as MCP tools so AI clients like Claude, Cursor, and Goose can call your FileMaker logic directly.
This documentation is for OttoFMS OData MCP Servers only. If you are looking for information on how to use the OttoFMS Admin MCP Server, see the Admin MCP Server documentation.
OttoFMS MCP (Model Context Protocol) Servers are a method to expose your FileMaker Applications to AI clients like Claude, Cursor, and Goose. You can define your own MCP servers and tools in OttoFMS and use them from AI clients in a chat like interface. For more information on the MCP servers and tools check out the MCP documentation.
OttoFMS MCP Servers are a wrapper for the FileMaker OData API allowing you to expose scripts that you write in your FileMaker Applications as part of an MCP server. This means that you can write any sort of behavior you want from within FileMaker and expose it without any need to use an extra tool or service (other than OttoFMS).
OttoFMS OData MCP Servers can be authenticated with a Data API Key, or by signing in directly with a FileMaker account. The Data API Key used must be for the FileMaker file the MCP server is connected to and it must have OData privileges.
Signing in with a FileMaker account requires OttoFMS 4.18.0 or later. On earlier versions, connect using a Data API Key as described below.
Getting Started
You'll need a couple things prepared before you can create an MCP Server:
- A FileMaker Application you want to expose functionality or data from.
- A Data API Key for the FileMaker Application that has OData privileges. (Both the User account and the Data API Key need to be enabled for OData). Ideally, this key is also enabled for the Data API, as we use the Data API to query the list of scripts to make tool creation easier.
Script Preparation
Scripts for the MCP Server will take in a JSON Object as the Script parameter. You can define the structure of the JSON object when you define the tool parameters, but OttoFMS currently only supports top level keys and string, number, and boolean values. String and number keys can be arrays. This may change in a future version.
Example JSON object:
{
  "firstName": "John",
  "lastName": "Doe",
  "age": 30,
  "isStudent": true
}
Unsupported JSON object:
{
  "type": "Person",
  "param": [
    {
      "name": "John",
      "age": 30
    },
    {
      "name": "Jane",
      "age": 25
    }
  ]
}
MCP Scripts should return either a string or a JSON object. This value will be passed directly back to the AI client as the response to the tool call, so it should include all information you may want to expose to the user. Unless you are using a private LLM, all data sent back from tools will be sent to the LLM, so be mindful of privacy concerns.
Creating an MCP Server
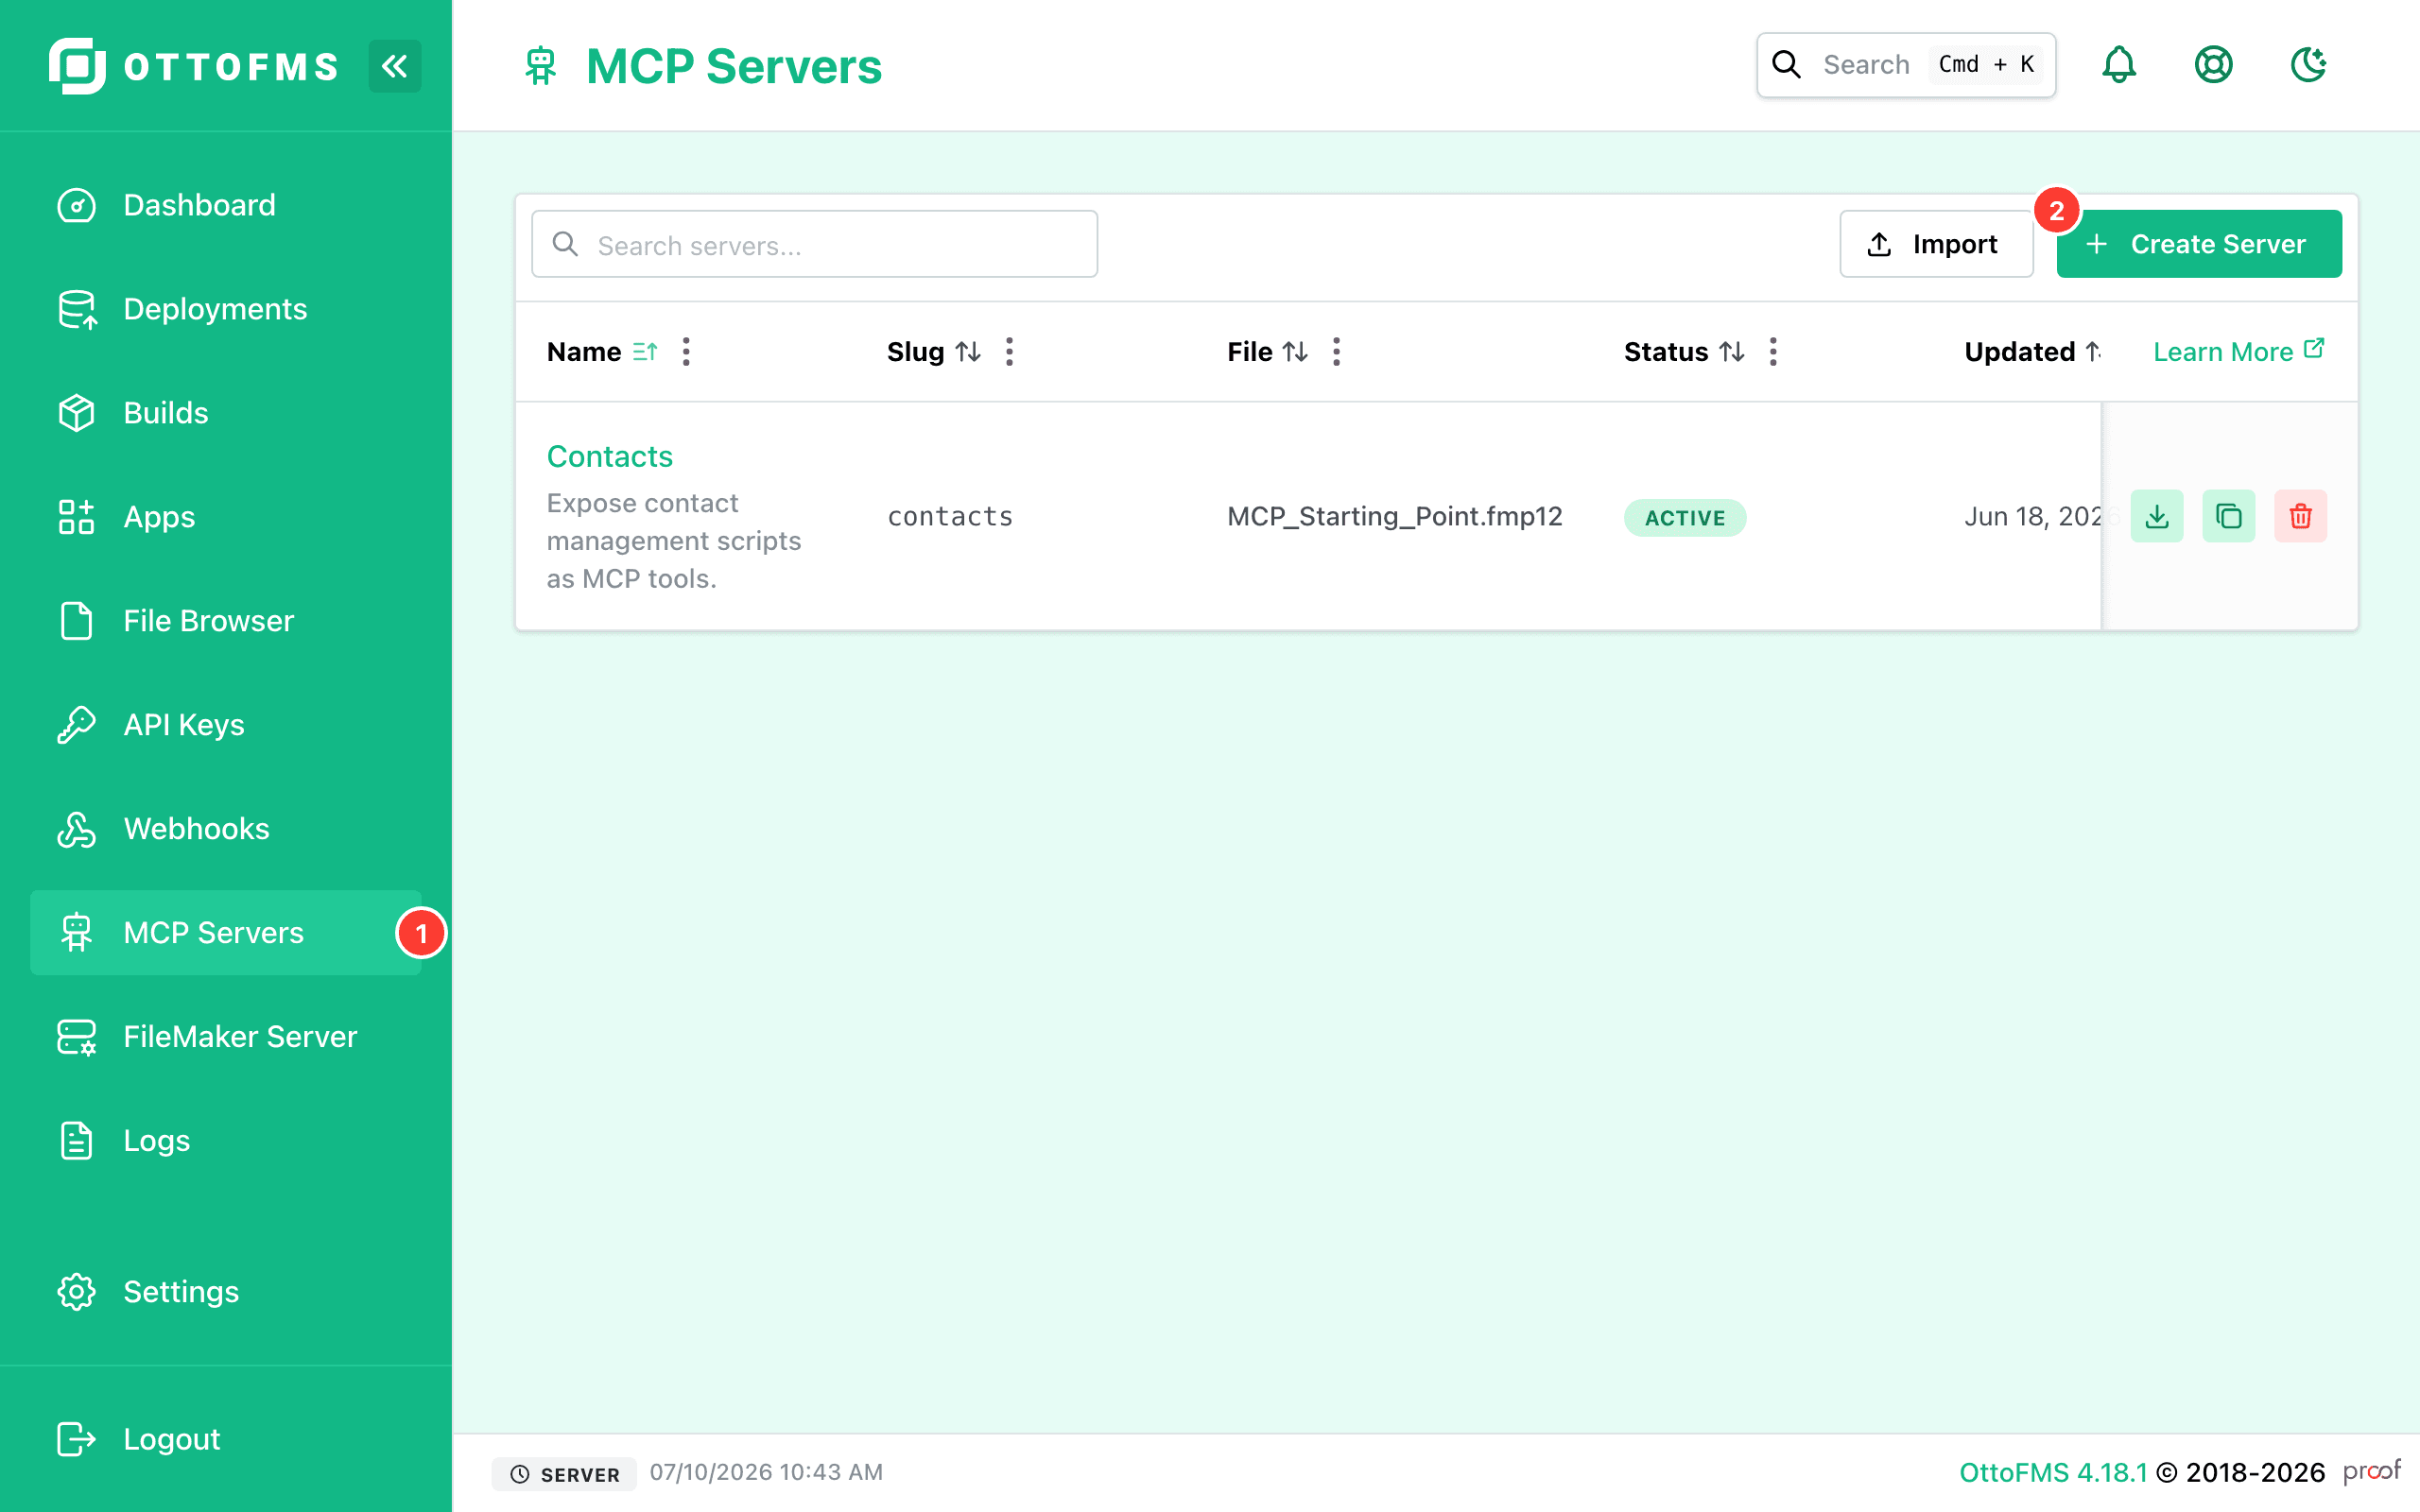
To create an MCP Server, you'll need to navigate to the MCP Servers page in the OttoFMS console.
Click the "Create MCP Server" button in the upper right to create a new MCP Server.
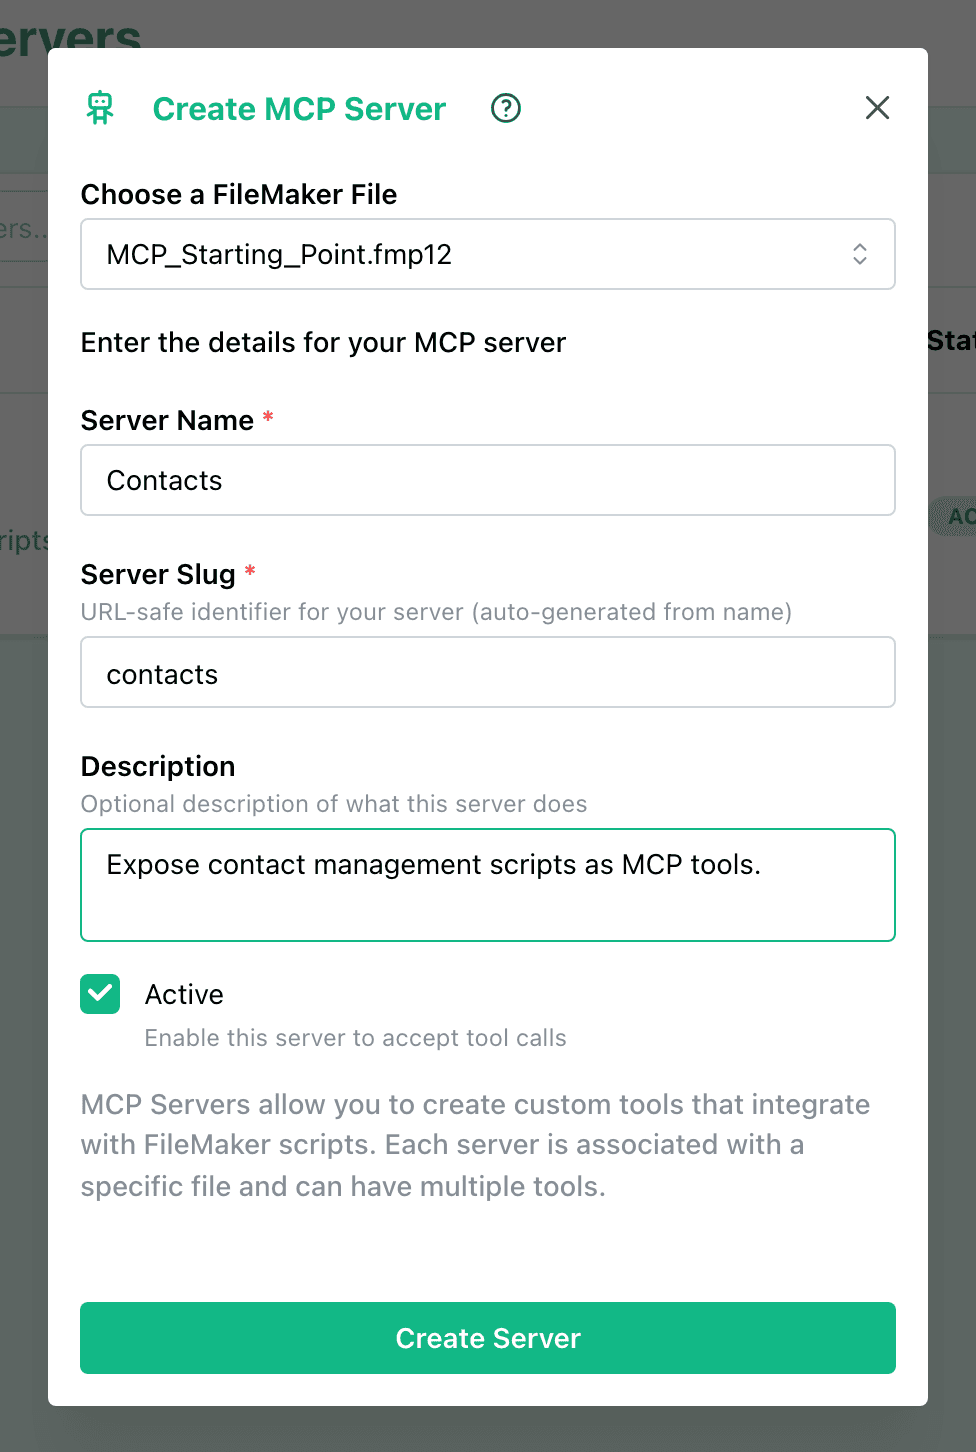
Fill out the form in the modal dialog that pops up. When you have entered everything correctly click the "Create Server" Button.
The MCP Server description will be exposed to the AI client to help it understand which server does what. The slug is used for the server in urls and should be unique.
Adding tools
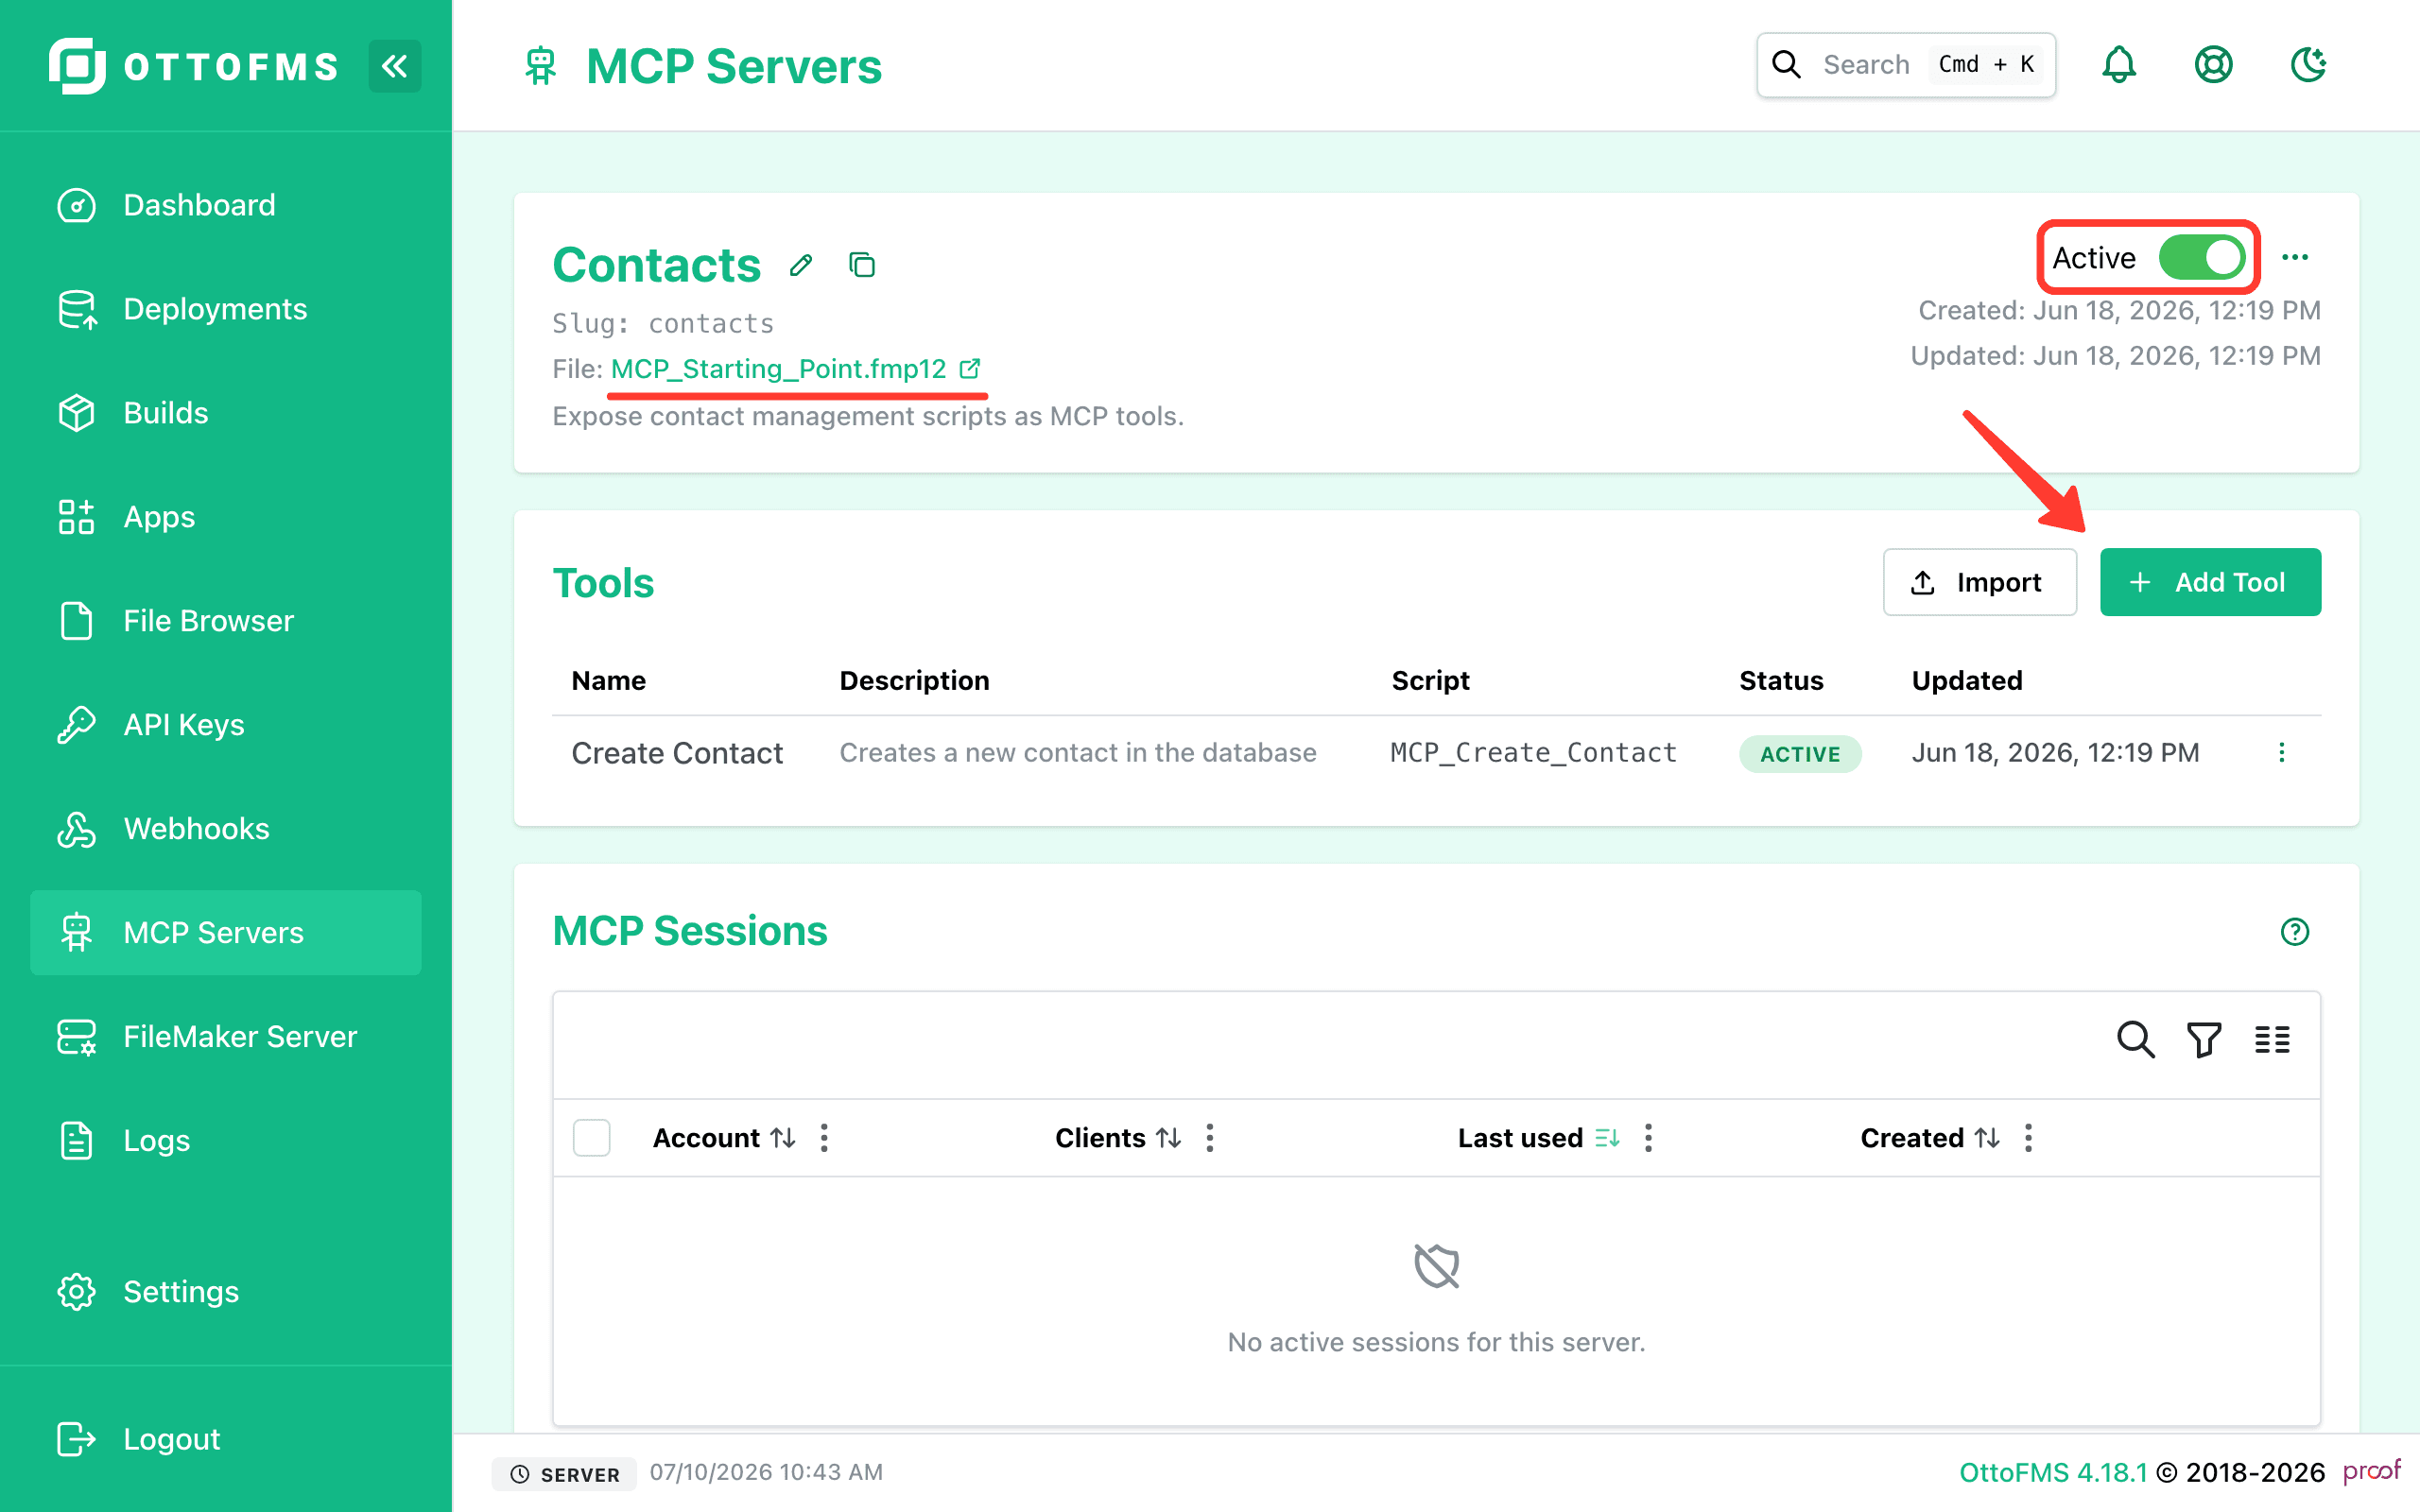
To add a tool, click the "Add Tool" button in the upper right of the MCP Server page.
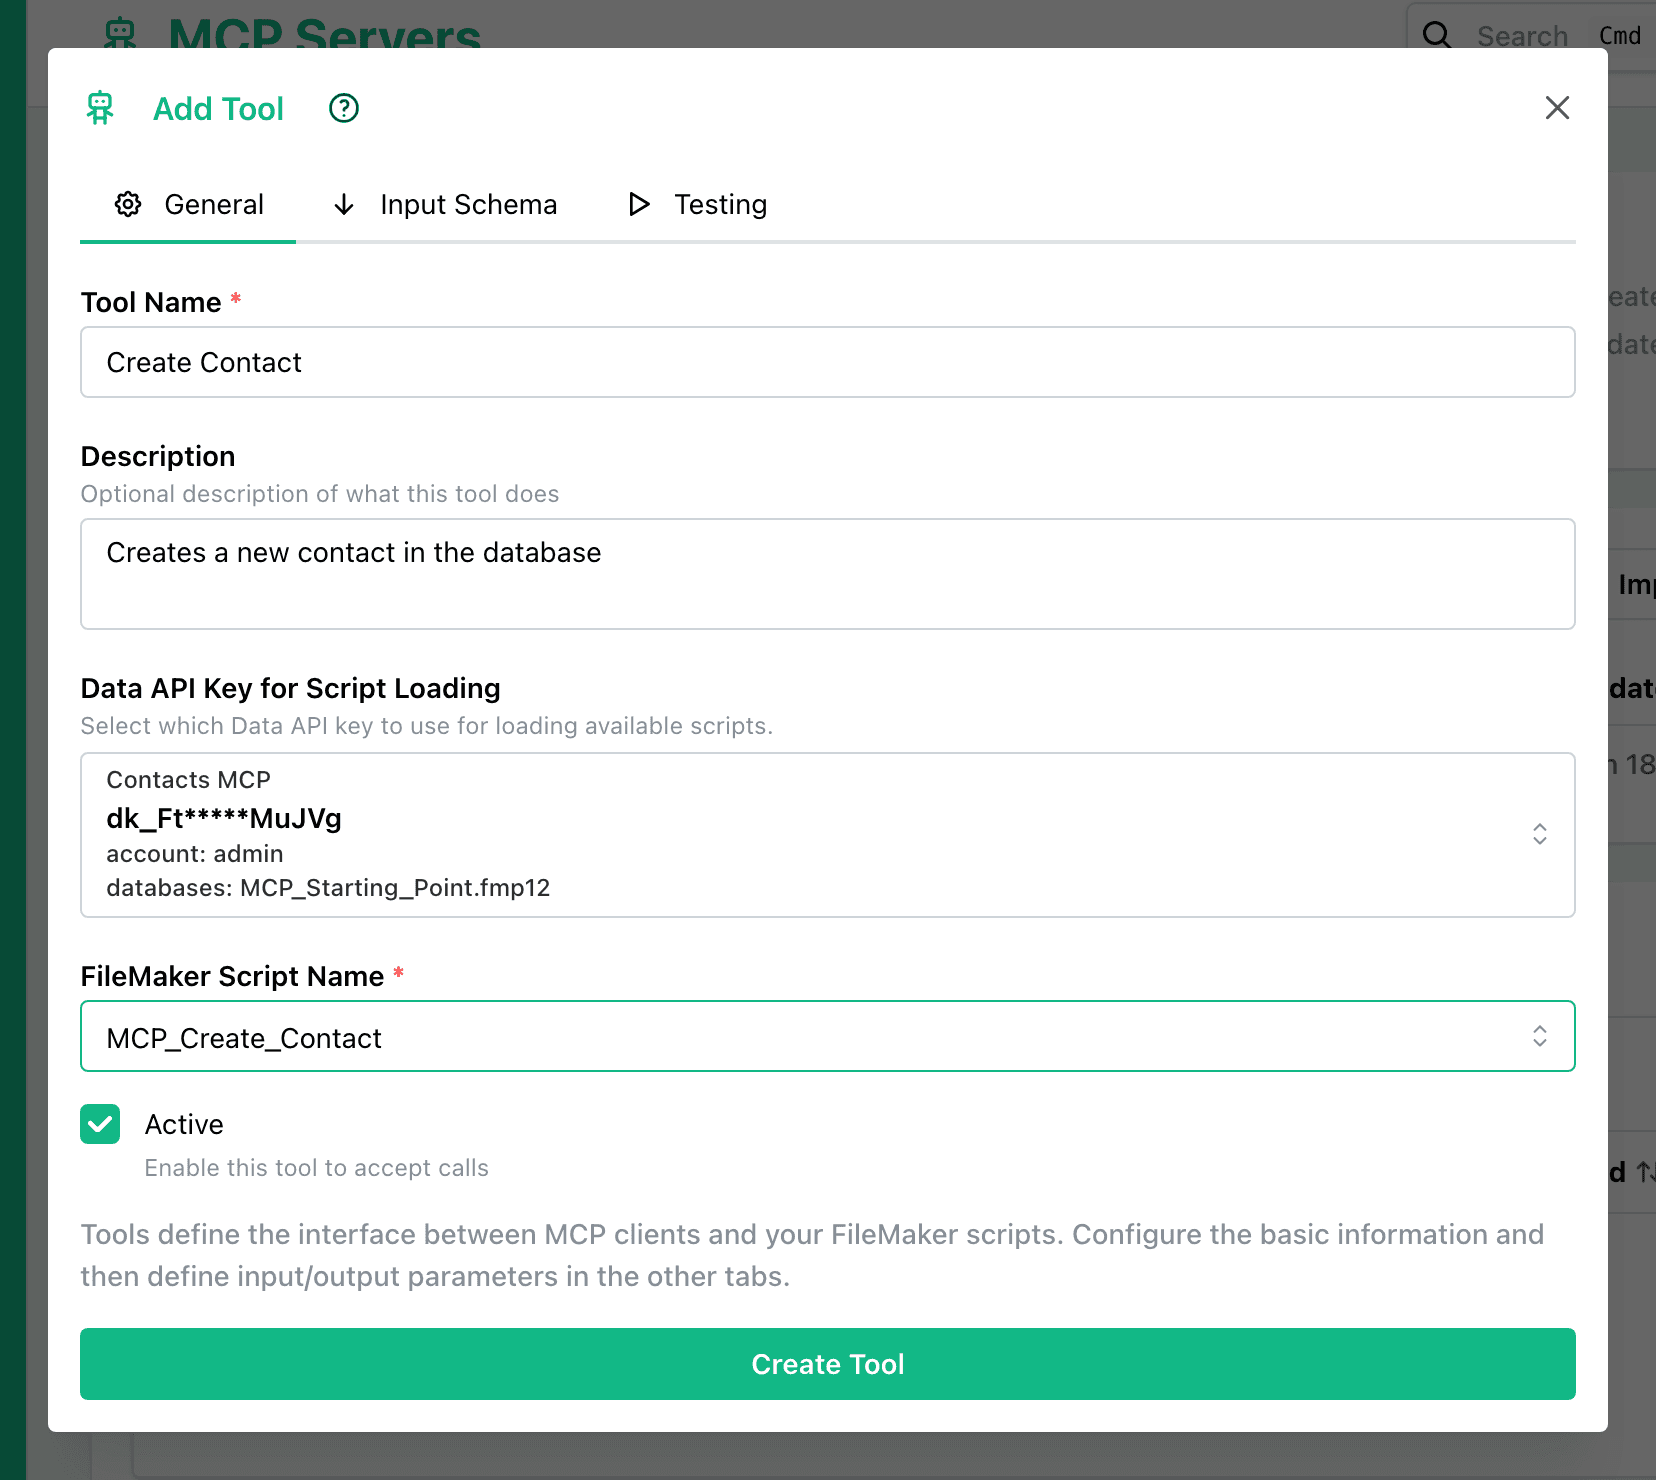
The modal that pops up has three tabs, which will let you define the tools name, description, script, parameters, and run a test.
The General tab will let you define the tools name, description, and script as well as the active status. The active status will determine if the tool is exposed to the AI client. The name and description will be used by the AI Client to help it understand which tool does what, so it is important to make them descriptive.
The Input Schema tab will let you define the parameters that the tool will take. Each parameter is a key in the JSON object passed to the tool.
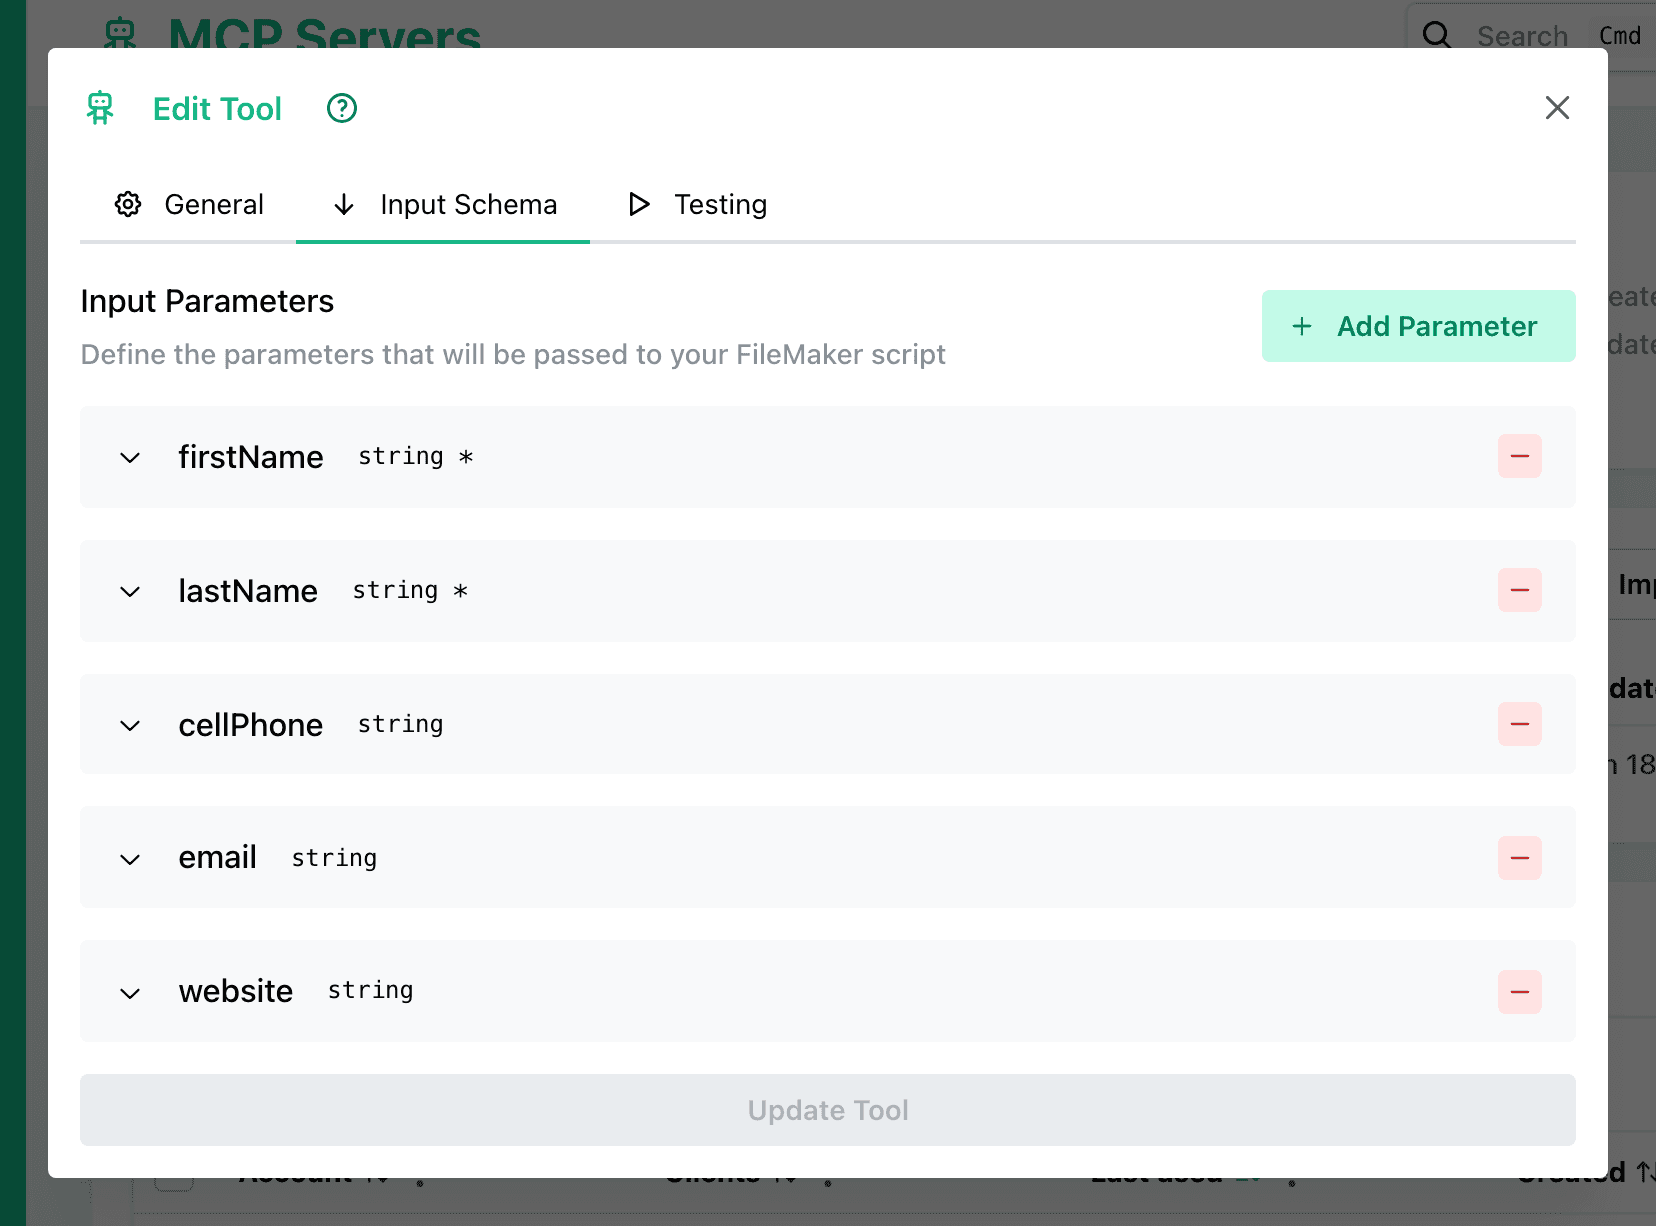
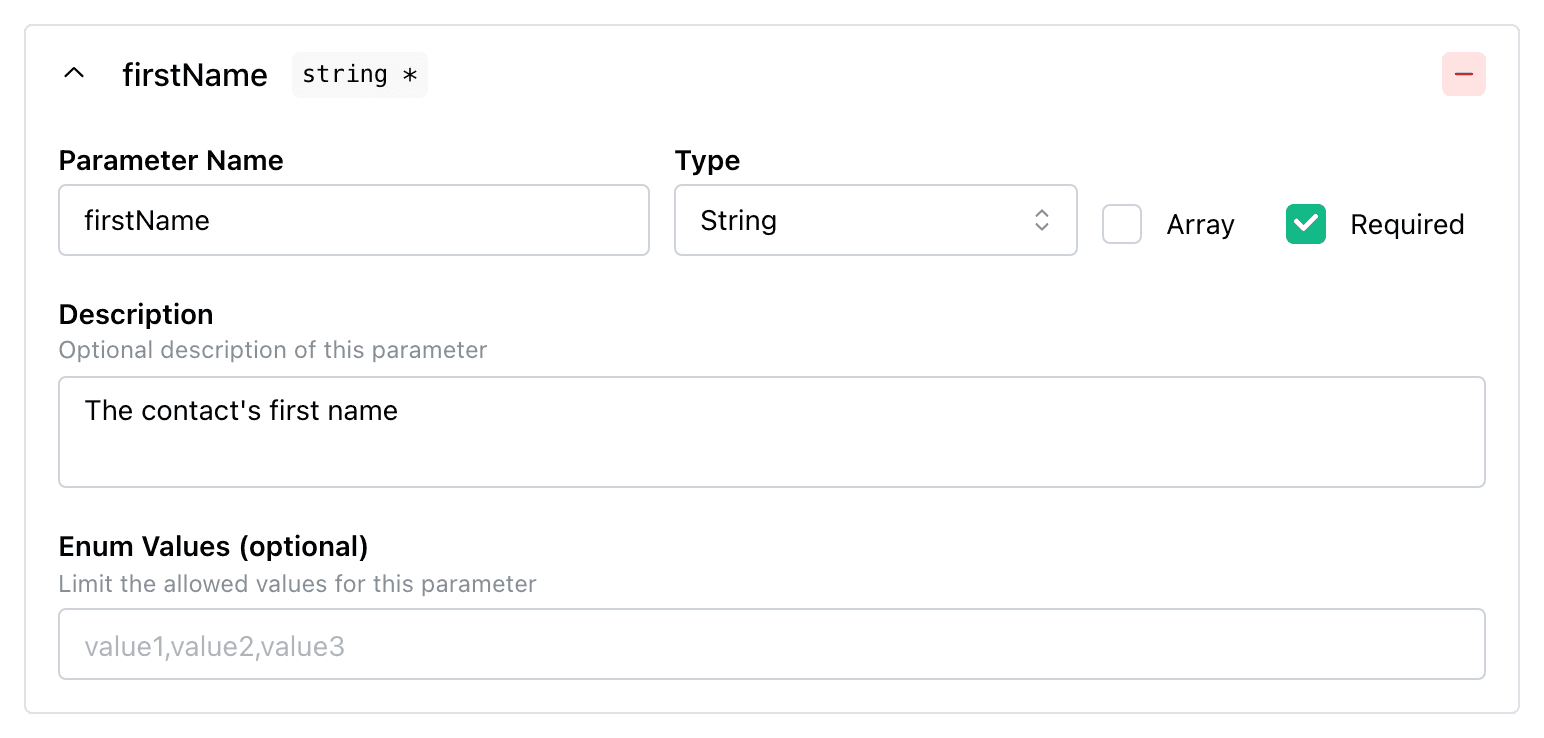
Each parameter has a name and description, as well as a type. The type can be one of the following:
- String
- Number
- Boolean
Strings and Numbers can have the array option toggled on, in which case the tool will take an array of strings or numbers for that key in the JSON object.
Strings can have enum values defined, which will limit the values that can be passed in to a predefined list.
A parameter can also be marked as required, which will require the parameter to be passed in when the tool is called. Optional parameters may be omitted from the JSON object passed to the tool.
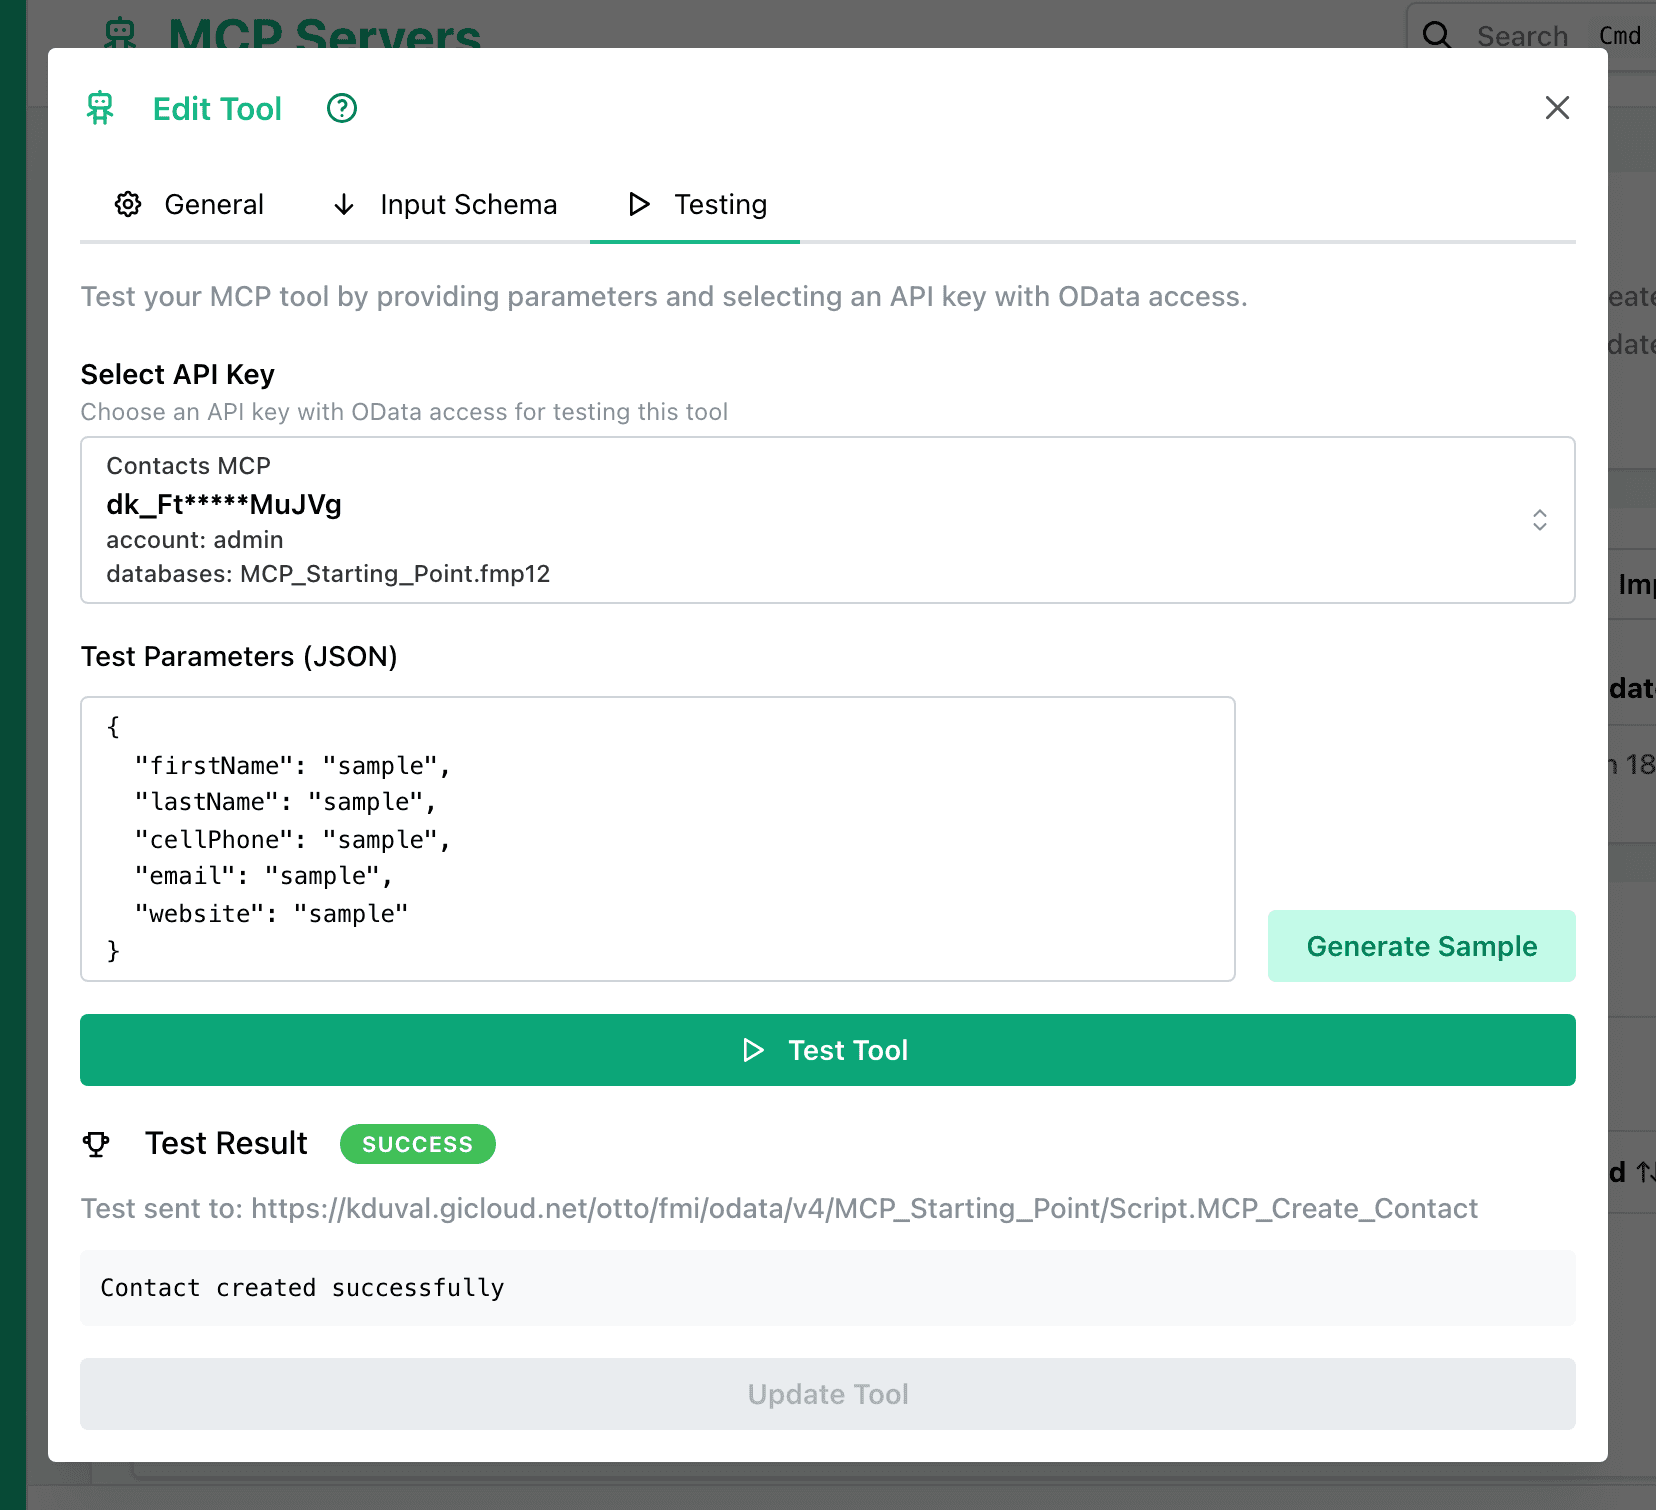
The Test tab can be used to test the tools functionality (or run the script remotely if you just want to trigger it manually). This will directly call the script via OData so you can see the result given based on the parameters you passed in.
Managing MCP Servers
Once a server is created, you can manage it from its dashboard or from the MCP Servers list.
Copy Config
Click "Copy Config" on a server's dashboard to generate the full configuration you'd otherwise have to assemble by hand. It produces the same JSON shown in the manual setup instructions below, pre-filled with your server's URL and your selected Data API Key, ready to paste directly into your AI client's config file.
Editing a server
Click the pencil icon next to a server's name to edit its Name, Slug, database file, and Description.
Changing the Slug will break existing integrations — any applications using the current slug will need to be updated. A warning is shown in the edit dialog if you change it.
Deleting a server
You can delete an MCP Server from its dashboard (via the actions menu) or from the MCP Servers list. Deleting a server also removes all of its tools. This cannot be undone.
Duplicating a server
Choose "Duplicate" from a server's actions menu to create a copy of it, including all of its tools. You can duplicate onto the same server (optionally pointing the copy at a different database file) or copy it to a different MCP server entirely.
Copying and duplicating tools
Each tool has a "Copy" option in its actions menu. Choose a target server to copy the tool to — if you pick a different server, the tool is copied there; if you pick the same server, it creates a duplicate of the tool on that server.
Export & Import
Use "Export" on a server or a tool to download it as a JSON file. Exporting a server includes all of its tools. You can then use "Import" to bring that file into another server (or the same one) — imported servers and tools are always created as new items, they don't overwrite anything existing.
MCP Sessions
Requires OttoFMS 4.18.0 or later.
When someone signs in to a server with a FileMaker account (see Signing in with a FileMaker account below), that connection shows up in the "MCP Sessions" card on the server's dashboard. Each row shows the FileMaker Account that signed in, which Clients (AI tools) are currently connected with that sign-in, when it was Last used, and when it was Created.
If you no longer want a signed-in account to have access, click the trash icon on its row and confirm "Revoke" in the "Revoke session?" dialog. This immediately blocks that account from accessing the file through OAuth — any connected AI client will need to sign in again to keep using the server. You can also select multiple sessions and revoke them all at once.
Sessions created with a Data API Key are not affected by MCP Sessions — this card only tracks sign-ins made with a FileMaker account.
Using the MCP Server with AI clients
Once you have created an MCP Server and added tools, you can connect to it from AI clients like Claude, Cursor, and Goose either by signing in with a FileMaker account or by adding a Data API Key to your client's configuration.
Signing in with a FileMaker account
Requires OttoFMS 4.18.0 or later.
Instead of generating and distributing a Data API Key, you can let people connect by signing in with the same account they already use to open the FileMaker file. In an AI client that supports it, this means pasting in the MCP server's URL rather than a full config block with a key baked in.
Paste the MCP server's URL (https://[your.server.hostname]/otto/mcp/[your-mcp-server-slug]) into your AI client wherever it asks for an MCP server address.
The client will open a sign-in page titled "Sign in to [file name]". Enter the FileMaker account name and password used to open that file, then click "Sign in". This is the same account name and password used to open the database — it does not need to be a Data API Key.
On the "Authorize access" screen, review the requesting application and the file it wants to access, then click "Approve" to finish connecting (or "Deny" to cancel).
Once approved, the client is connected and only shows the tools that account's FileMaker privileges allow it to run — if the account can't run a given script, the tool for it won't be offered. Access can be revoked at any time from the MCP Sessions card on the server's dashboard.
Signing in with a FileMaker account requires the account to have OData access, since OttoFMS OData MCP Servers are built on top of the FileMaker OData API.
Connecting with a Data API Key
You can also connect by adding the server's URL and a Data API Key directly to your AI client's configuration. This is the best option for clients that don't support signing in interactively, or when you want a single shared connection that isn't tied to one person's FileMaker account.
In Claude Desktop, you can add the following entry to your MCP config file (Claude Desktop > Settings > Developer > Local MCP Servers > Edit Config)
{
  "mcpServers": {
    "your-custom-name": {
      "command": "npx",
      "args": [
        "-y",
        "mcp-remote@latest",
        "https://[your.server.hostname]/otto/mcp/[your-mcp-server-slug]",
        "--header",
        "Authorization: Bearer [data-api-key]"
      ]
    }
  }
}
Make sure to replace [your.server.hostname] with your server's hostname, [your-mcp-server-slug] with your MCP Server slug, and [data-api-key] with your Data API Key.
After saving this and reloading your config, you should see your server listed in the tools section of your client. Most clients will give you options to turn off tools you don't want to make available to the AI agent you're working with.
In Cursor, you can add the following entry to your MCP config file (Cursor > Cursor Settings > MCP & Integrations > Add Custom MCP)
{
  "mcpServers": {
    "your-custom-name": {
      "command": "npx",
      "args": [
        "-y",
        "mcp-remote@latest",
        "https://[your.server.hostname]/otto/mcp/[your-mcp-server-slug]",
        "--header",
        "Authorization: Bearer [data-api-key]"
      ]
    }
  }
}
Make sure to replace [your.server.hostname] with your server's hostname, [your-mcp-server-slug] with your MCP Server slug, and [data-api-key] with your Data API Key.
After saving this and reloading your config, you should see your server listed in the tools section of your client. Most clients will give you options to turn off tools you don't want to make available to the AI agent you're working with.
In Goose, you can add the MCP server as an extension. Head to Goose > Extensions > Add custom extension to get the setup screen.
You'll need to enter a custom name for your server and switch the Type field to Streamable HTTP. Enter a description as you see fit and add https://[your.server.hostname]/otto/mcp/[your-mcp-server-slug] as the Endpoint. Add a header to the Request Headers section with the name Authorization and the value Bearer [data-api-key]. Click Add Extension and you should be good to go.
For clients that support a generic mcp config file, you can add the following entry to your MCP config file:
{
  "mcpServers": {
    "your-custom-name": {
      "command": "npx",
      "args": [
        "-y",
        "mcp-remote@latest",
        "https://[your.server.hostname]/otto/mcp/[your-mcp-server-slug]",
        "--header",
        "Authorization: Bearer [data-api-key]"
      ]
    }
  }
}
Make sure to replace [your.server.hostname] with your server's hostname, [your-mcp-server-slug] with your MCP Server slug, and [data-api-key] with your Data API Key.
After saving this and reloading your config, you should see your server listed in the tools section of your client. Most clients will give you options to turn off tools you don't want to make available to the AI agent you're working with.
Was this page helpful?