Builds
Configure, tag, publish, and manage reusable builds in OttoDeploy, including turning an existing deployment into a build and tuning compression and memory.
The Builds view is where you can setup and manage your builds. You can access the Builds view by clicking on the Builds link in the left hand navigation. Read more about Builds.
List View
The list view is the default view for the Builds view. It displays a list of all the builds you have configured. Add a new build by clicking the New Build button. Click on a build to view the build detail view.
A Tags column lets you filter the list by tag. You can also group the list by source server or by tags from that column's header menu — your grouping choice is remembered the next time you open OttoDeploy. Tags are applied to a build from its detail view.
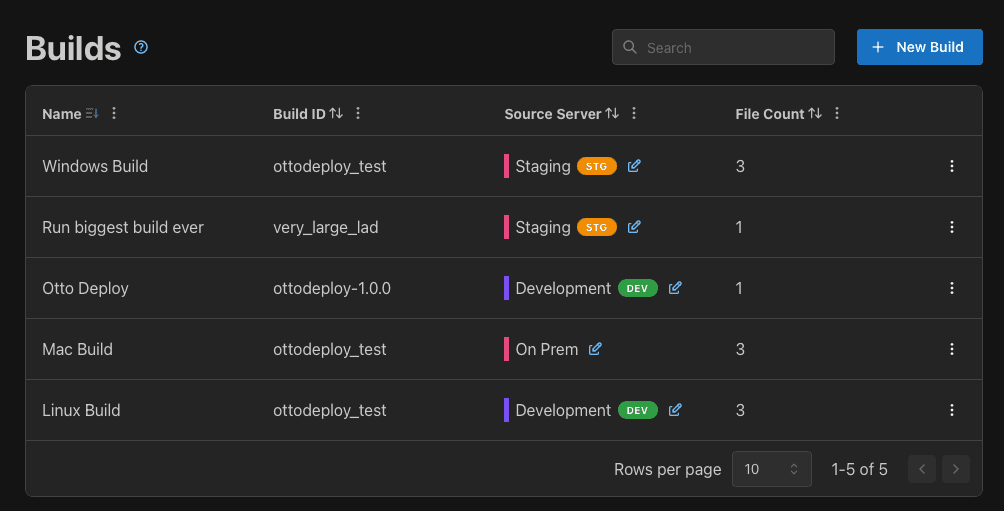
Builds can be managed with the three dot menu on the right hand side of the list. This menu is also available in the build detail view. From it you can:
- Duplicate the build.
- Delete the build from OttoDeploy. The delete dialog includes a "Delete from server?" option to also remove the build from the server's outbox at the same time.
- Copy Build JSON — view or copy the build's JSON configuration. Secrets are hidden by default; turn on "Show Secrets?" to reveal them.
- Download the build from the server, or Remove from Server to delete it from the server's outbox. These two act on the copy held in the server's outbox, so they are only available while the build is in the outbox — otherwise they are disabled.
Build Detail
The build detail view is where you can configure your build.
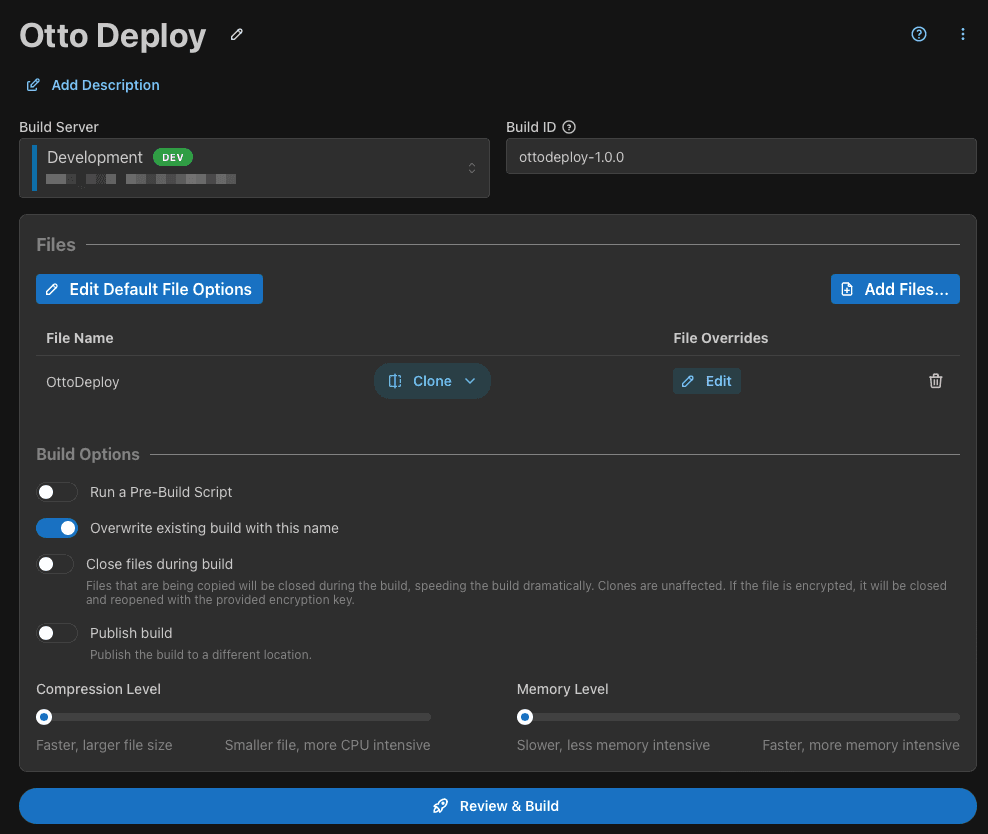
The build's files table can be sorted by File Name and Operation.
Creating a Build from a Deployment
If you have a deployment that already fetches and prepares the exact set of files you want, you can turn it into a reusable build instead of setting one up from scratch. Open the deployment's menu and choose "Create Build from Deployment" — or, in advanced mode, do this per sub-deployment.
When converting a deployment to a build:
- Files set to migrate become clones.
- Files set to install or replace become full copies.
- Close operations are excluded.
- Source credentials carry over from the deployment.
You'll land on the newly created build so you can review it. Nothing runs until you choose to send the build.
Build Options
Name
The build name is used to identify the build in the list view in OttoDeploy. It is not required, but it is recommended to give your build a name that is descriptive of what the build does.
Build ID
The build Id is the unique identifier for the build. It should be unique to the build and will be the name of the build zip file and hte folder for the build in the OttoFMS outbox. it is recommended that you use the build Id to add a version number if you are using builds to version your application.
Pre-build Script
The pre-build script is a script that will be run before the build is started. This is useful for setting up the environment for the build. For example, you may want to run a script to update the version number in your application before the build starts.
Overwrite existing build with this name
This setting can be used to overwrite an existing build with this ID. If this is not checked, and a build with the same ID already exists, the build will fail.
Zip Files
By default, OttoFMS zips the build files into a .build.zip file. In OttoFMS 4.10.0 or later, this can be disabled by unchecking the "Zip Files" option. This option is only recommended if you are planning on using the build locally and are not publishing to another location or using the build in a deployment on another server.
Close Files During Build
This setting closes the build files on the source server while the build is in progress, then reopens them once the build finishes. Copies of closed files are generally much faster than copies of open files, as OttoFMS does not need to use FileMaker to copy the files and can copy them directly. Additionally, copying a closed file does not need to create a backup of the external container data that may be used with the file, speeding up the process further.
Not to be confused with the Close Files After Build deployment option, which closes files on the destination server after a build completes.
Include Container Data
This setting can be used to include external container data in the build. If this is toggled on, container data for copies will be copied to the build and zipped into the .build.zip file that is created. When deploying from this build, you can then transfer the container data to the destination server using the Transfer Container Data option in the advanced options.
If you are building files in the Additional Database Folders that store container data in the Container Data Folders without the "Close files during build" option enabled, you must have the "Back Up Container Data Folder" option enabled on the FileMaker Admin Console's Configuration > Folders tab for external container data to be included in the build.
Publish Build
Publishing a build is a tool that can be used to make working with builds and moving them around simpler. When you publish a build, OttoFMS will create your build normally, and at the end of the build OttoFMS will push the build in a useable state to the destinations you have defined. Publish destinations are defined per build. Check out the Publishing Builds page for more information on what each publish destination type does and can be used for.
Send Notifications for this build
This setting can be used to send notifications for this build. Notifications are sent when the build starts and ends (successfully or otherwise). You can send notifications for builds to a webhook URL or to Slack. For details on notification types and their setup, head to the Notifications documentation. You can setup notifications in each build and in the OttoDeploy settings. Deleting a notification destination from the settings will not affect existing builds, but will prevent new builds from selecting that notification destination. Webhook notifications send a JSON Payload to the webhook url with details about the build and the events that trigger the notification.
Collect File Configuration
Turn this on to gather file notes, webhooks, and MCP server settings from the source files so they can be applied to the destination server during a deployment. See File Configuration for the full details, including sub-options and version requirements.
Compression Level
The compression setting allows you to specify the compression level for the build. The values for compression level go from 0 to 9, with 0 being an uncompressed build and 9 being the highest level of compression. An uncompressed zip file is the same size as the files that were put into it, with the file getting smaller the higher the compression level setting is. If you are having issues with files pulling down across the network for being too large it may be helpful to increase the compression level. A higher compression level will require more CPU usage and will take longer.
Memory Level
The memory setting allows you to specify the amount of RAM to use for the build. For servers without much RAM we recommend keeping this low. Increasing this setting will speed up the zipping process that we do as part of the build.
Was this page helpful?
Advanced Options
Unlock advanced OttoDeploy deployment controls like sub-deployments, alternate sources, file renaming, pre-deployment scripts, and concurrency tuning.
Servers
Add and manage the FileMaker servers OttoDeploy connects to, and organize them with labels and tags for deployments and builds.